How to configure SAML2 in weblogic 10.3
You need to have 2 weblogic domains which are already setup SSL. If not, please follow this article to do it How to configure SSL certificate on WebLogic server
Let's assume that one domain will work as IDP (Identity Provider) and the another will work as SP (Service Provider). IDP will store credentials, SP will be the place where we deploy our applications. And those applications will take credentials from IDP to pass the authentication (maybe authorization, too).
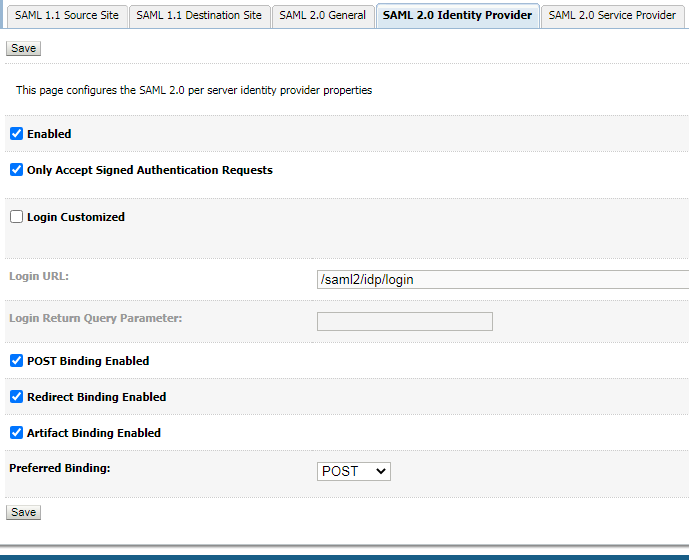
- Configure Federation Service for IDP 1.1 Configure SAML 2.0 Identity Provider Go to Admin server, click tab "Federation Service", then click "SAML 2.0 Identity Provider"
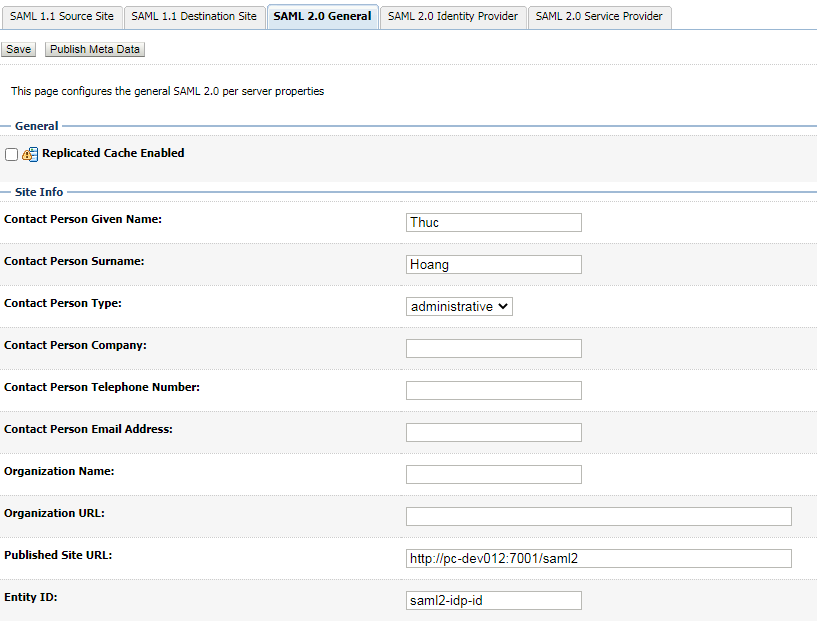
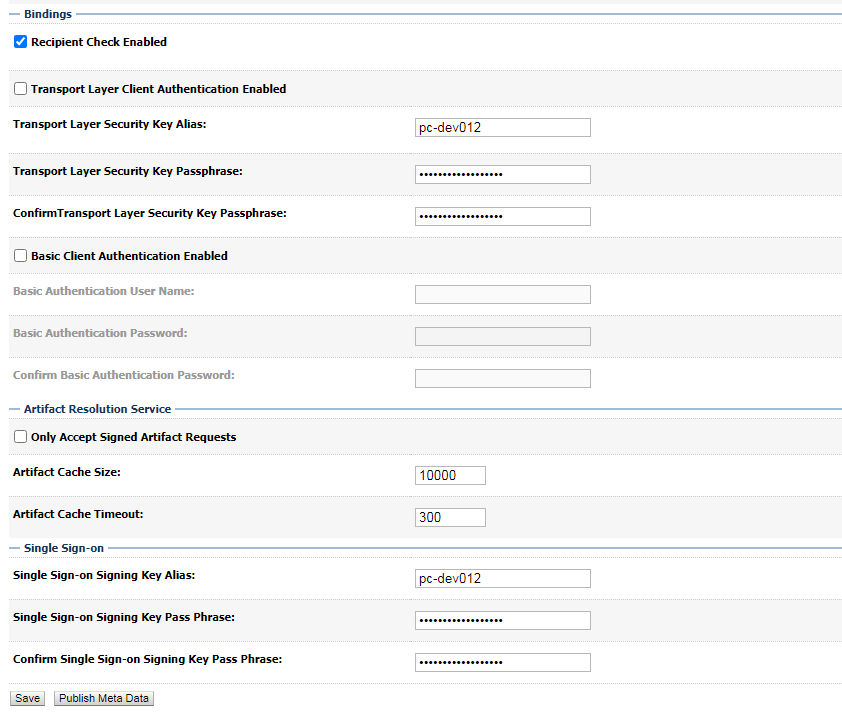
1.2 Congigure SAML 2.0 General Go to Admin server, click tab "Federation Service", then click "SAML 2.0 General"
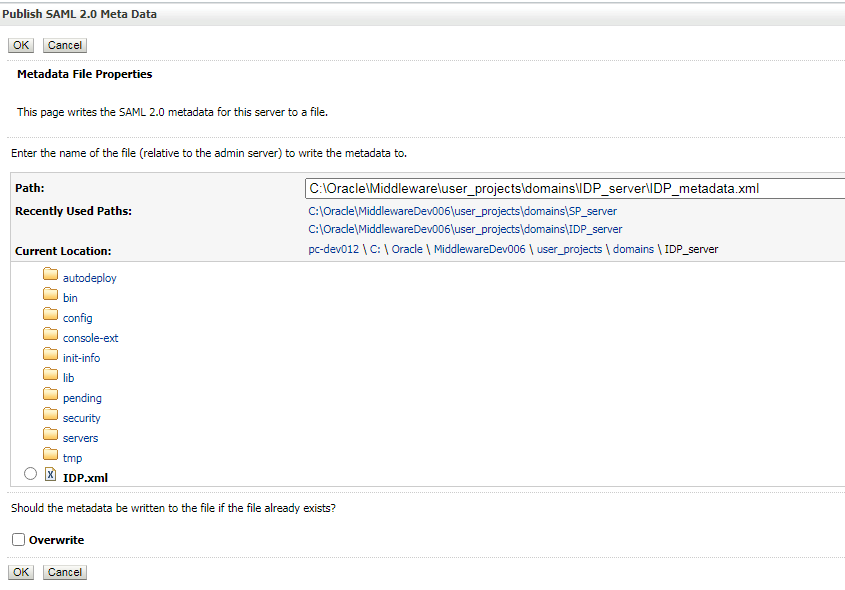
After saving, click "Pulish Meta data"
export data to a xml file as below, we will use the file to do configuration for SP later.
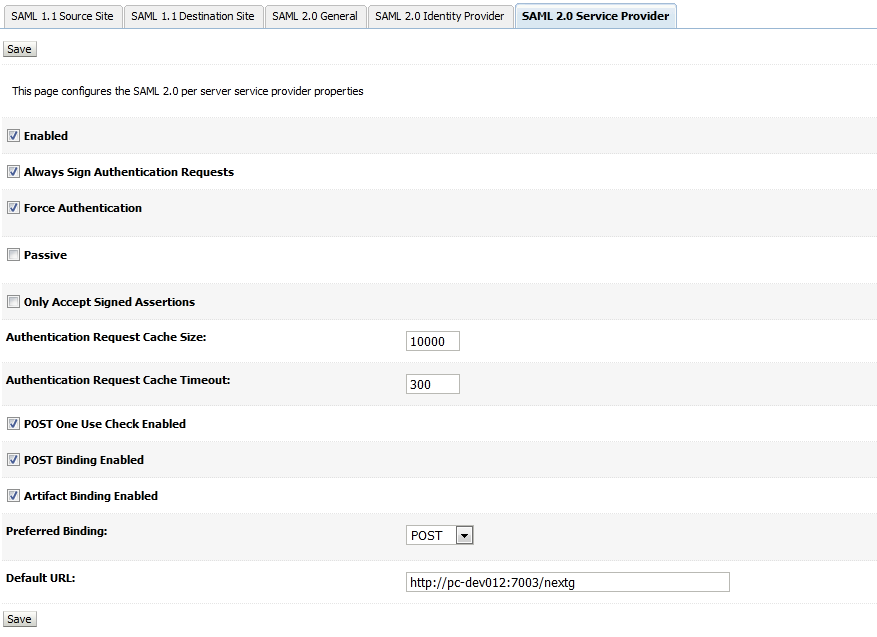
Configure Federation Service for SP 2.1 Configure SAML 2.0 Service Provider Go to Admin server, click tab "Federation Service", then click "SAML 2.0 Service Provider"
Please note that "Default URL" should be the URL of the application which takes credentials from IDP. http://sp-hostname:sp-port/context_of_the_app
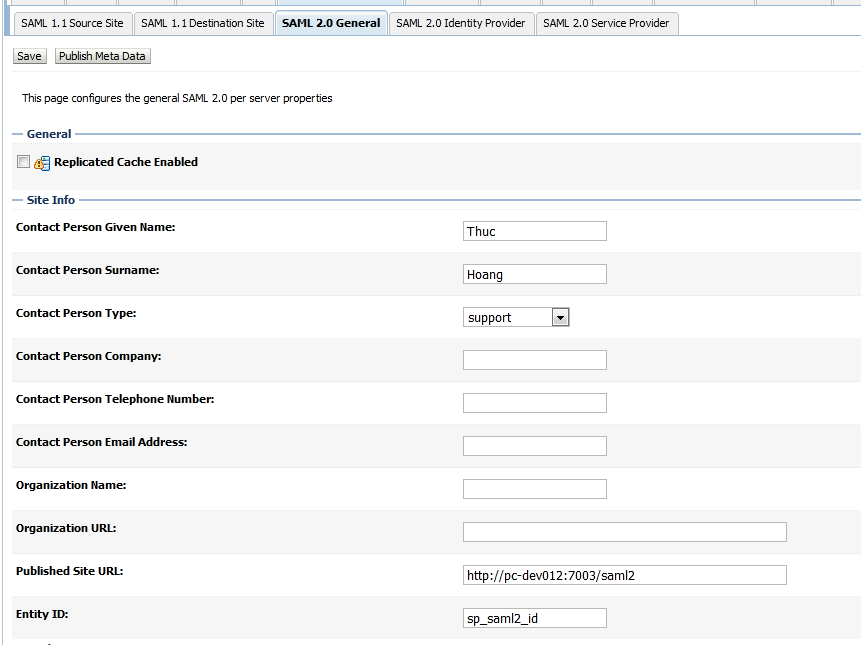
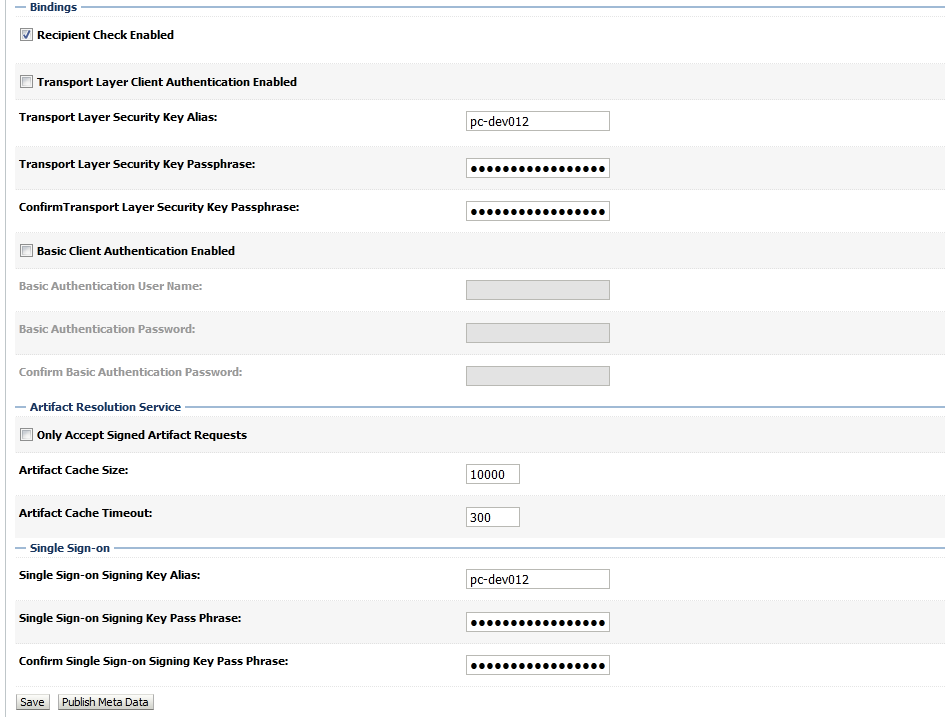
2.2 Congiure SAML 2.0 General Go to Admin server, click tab "Federation Service", then click "SAML 2.0 General"
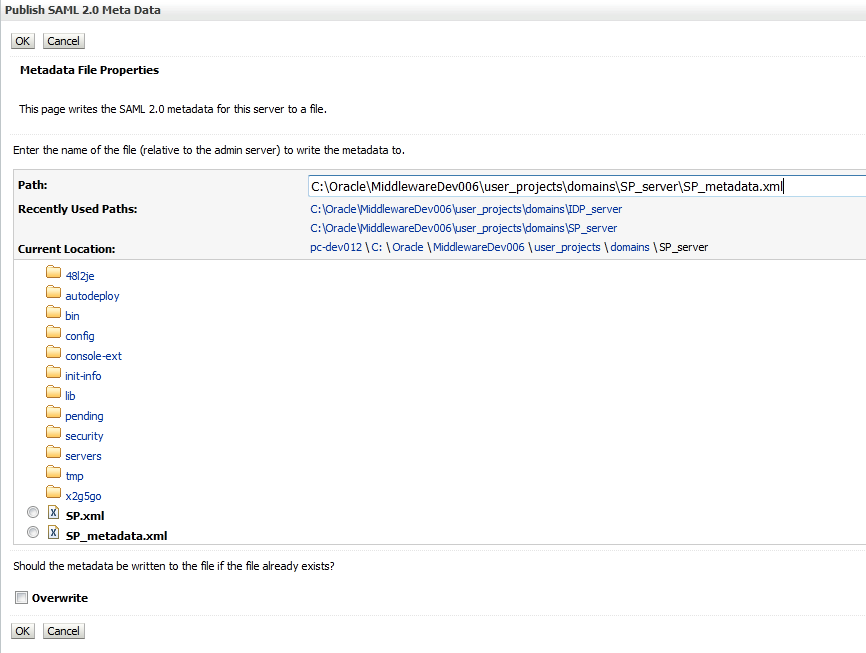
After saving, click "Pulish Meta data"
export data to a xml file as below, we will use the file to do configuration for IDP later.
- Configure security realms for IDP 3.1 Create new user Go to Security Realm -> my realm -> User and Group, click tab "User" and create a new user
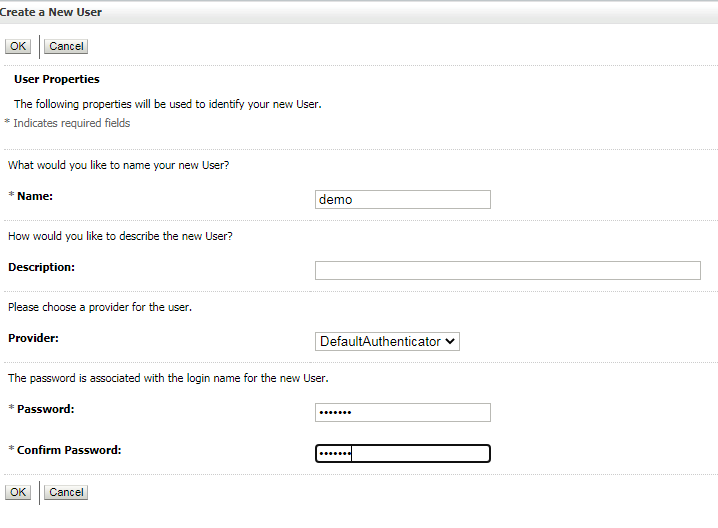
We will use the new user to login the app from SP.
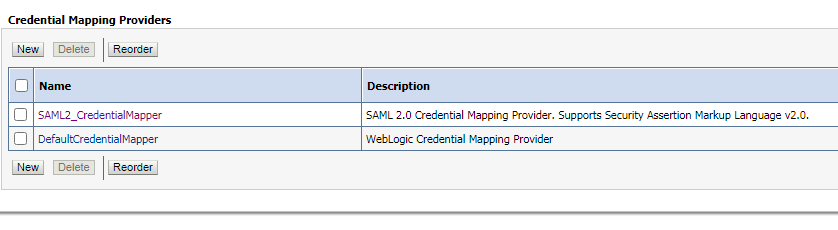
3.2 Create Credential Mapping Go to Security Realm -> my realm -> Providers, click tab "Credential Mapping", click "New"
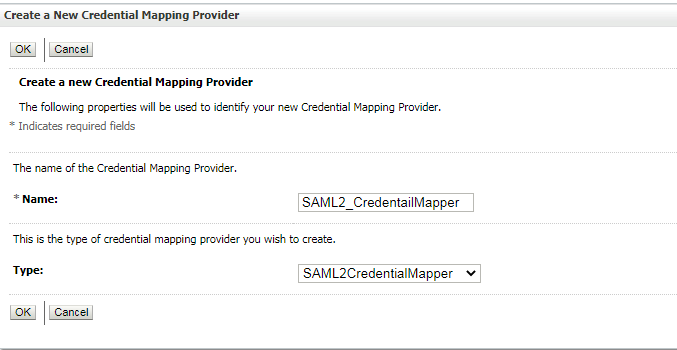
Don't forget to reorder Providers
restart domain
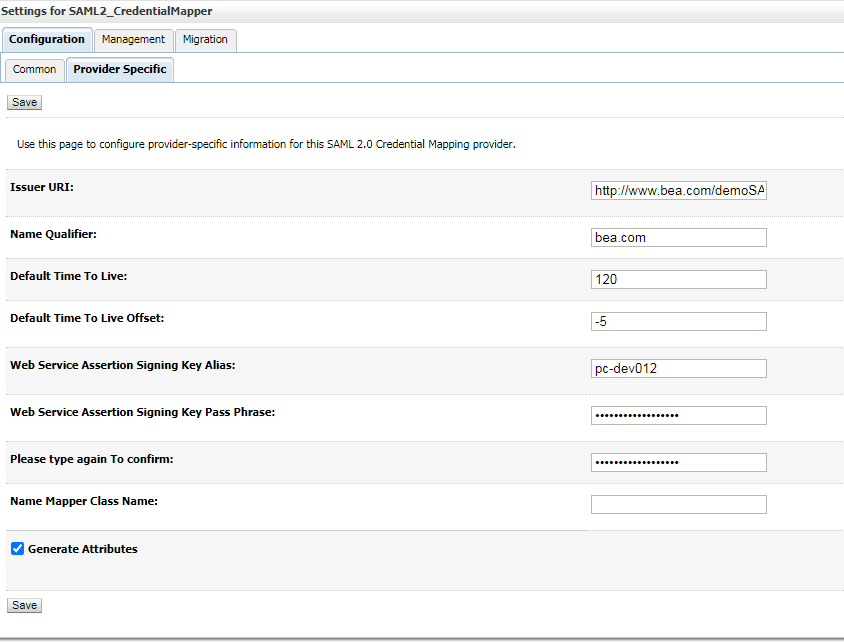
3.3 Configure Credential Mapping Provider Specific Click on the new credential mapping you just created at previous step, click tab "Provider Specific"
3.3 Configure Credential Mapping Management
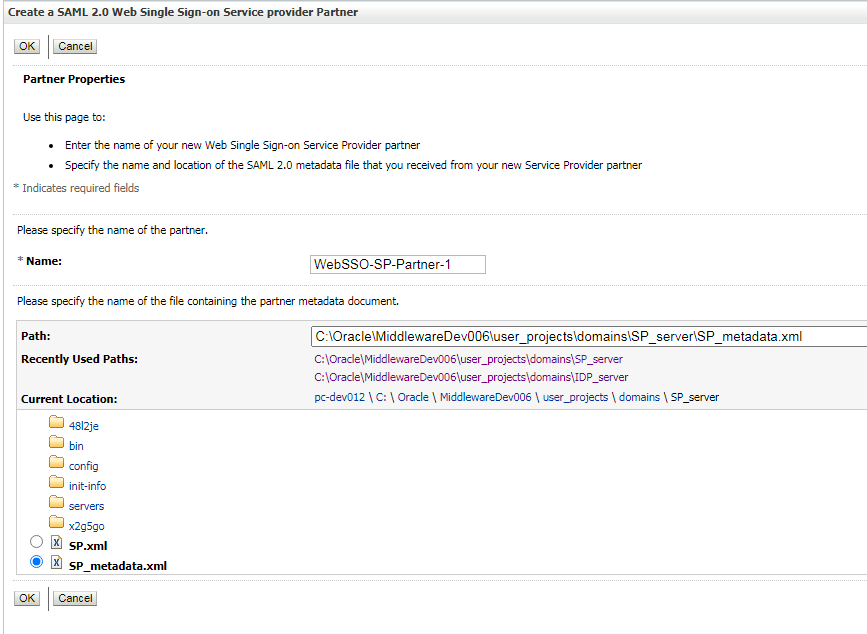
Click on the new credential mapping you just created at previous step, click tab "Management", click "New" -> Create a SAML 2.0 Web Single Sign-on Service provider Partner
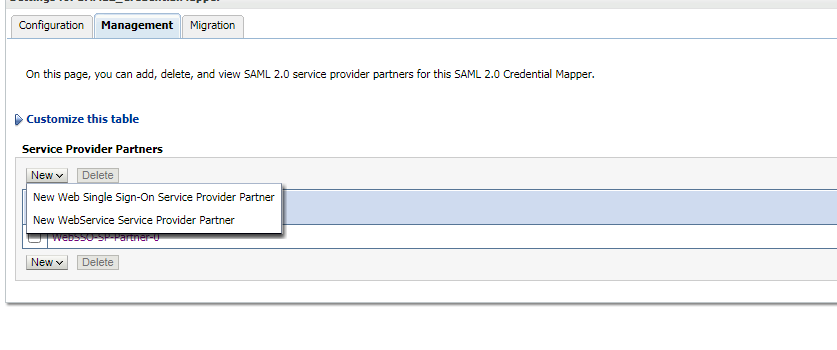
Point to the xml file that we created for SP domain.
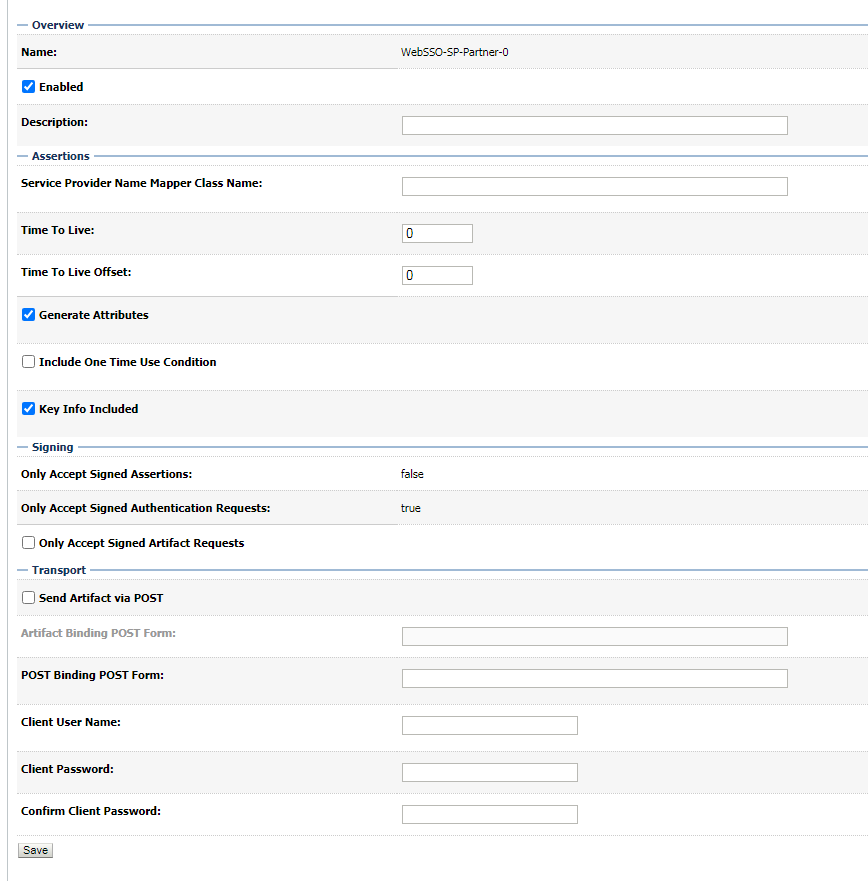
After that, click on the new SSO service provider partner, and do config like below
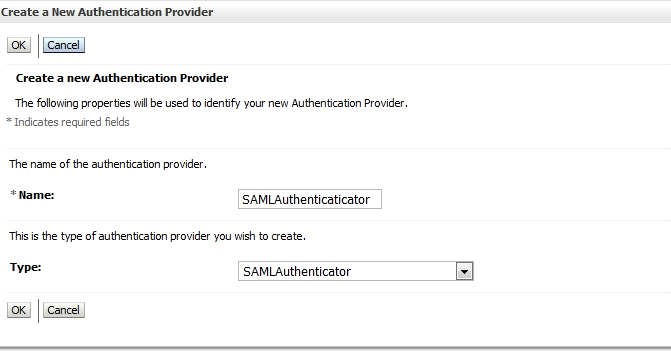
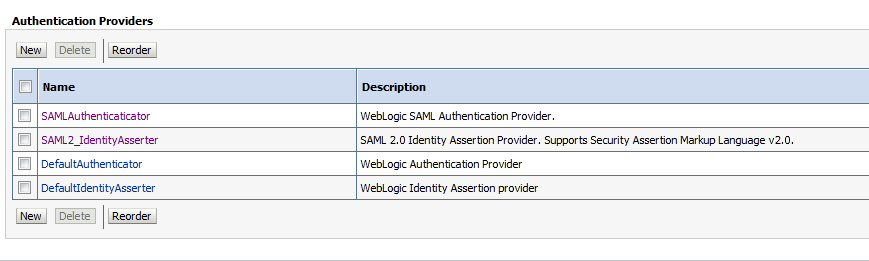
- Configure security realms for SP 4.1 Create SAMLAuthenticaticator Go to Security Realm -> my realm -> Providers, click tab "Authentication", click "New"
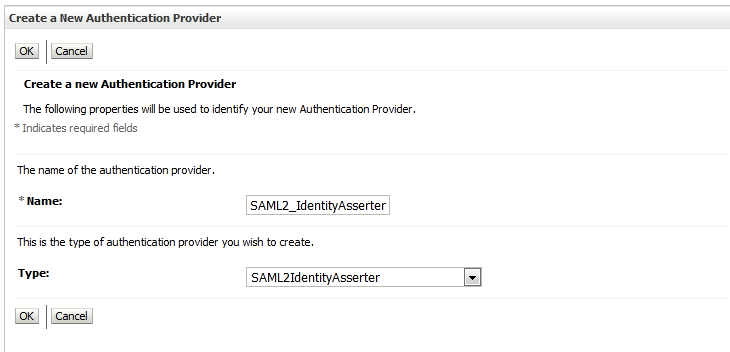
4.2 Create SAML2_IdentityAsserter Go to Security Realm -> my realm -> Providers, click tab "Authentication", click "New"
Don't forget to reorder Providers
Restart the domain
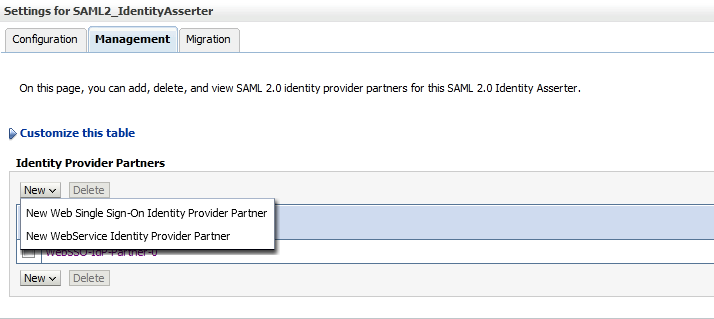
4.3 Configure SAML2_IdentityAsserter Management Click on SAML2_IdentityAsserter you just created above, click tab "Mangement", click "New" to Create a SAML 2.0 Web Single Sign-on Identity Provider Partner
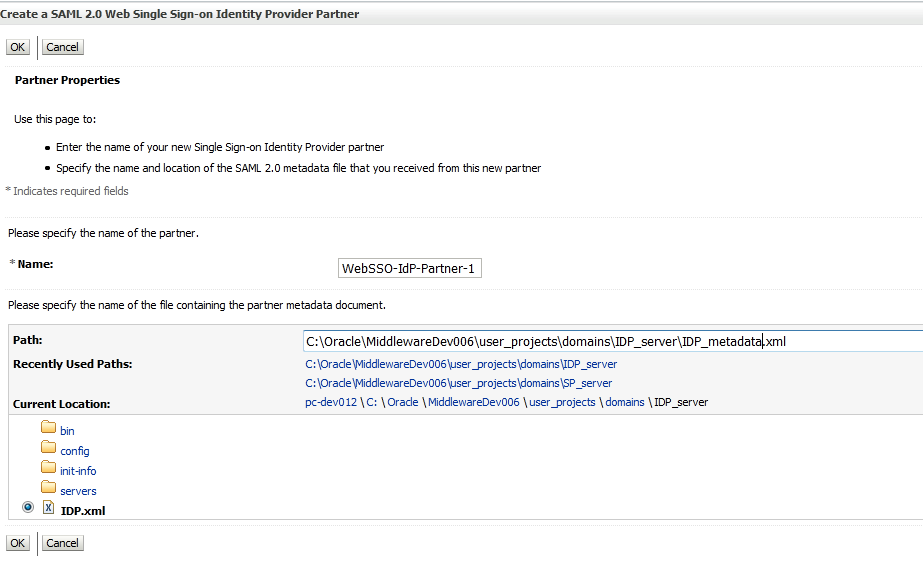
4.4 Create a SAML 2.0 Web Single Sign-on Identity Provider Partner Point to the xml file that you created for IDP domain above
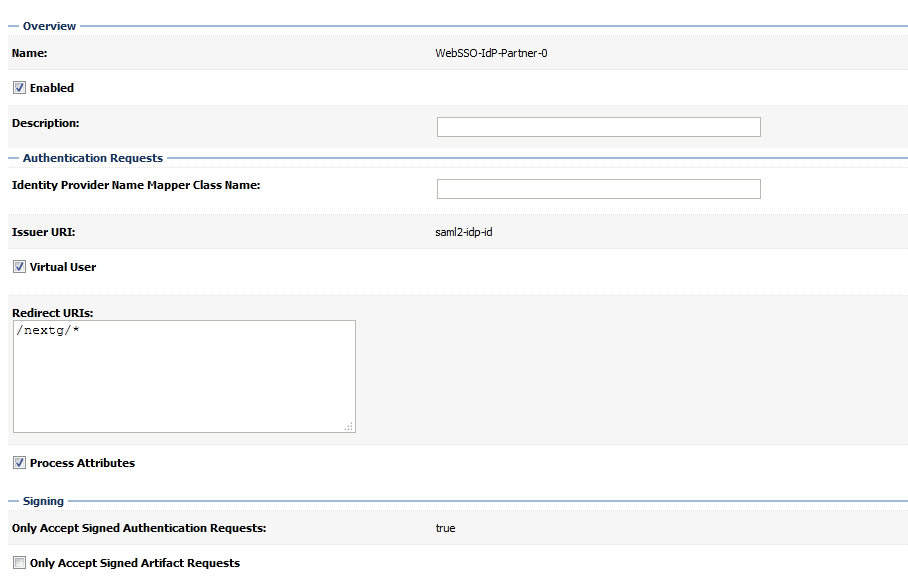
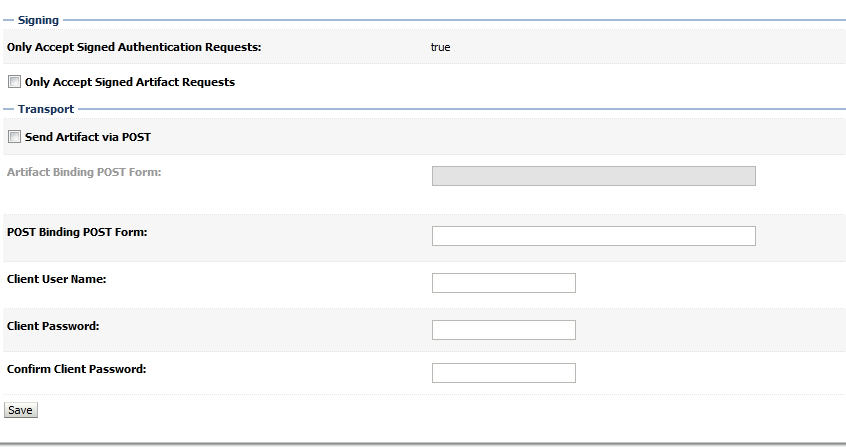
after that, click on the new SSO Identity Provider Partner, and config like below
Please note that Redirect URIs will be '/context_of_the_app/*'
That's all, now you can download this example Source code and deploy to SP domain. I'm configuring this app using BASIC authentication, when you access to the app, it will request you to input username/password. Just type in the username/password that you created at step 3.1